Quick Links
If you’ve reached chapter three ofIris Fall, you’ve already been through a bunch of puzzles that will have you scratching your head. Although, the difficulty ramps up a lot more as the hints for the puzzles in this chapter are a lot more discrete. You’ll need a lot of patience to get through the two rooms in this section.
RELATED:Iris Fall: Chapter One Walkthrough
The horror aspect of the game will also ramp up as the game reveals a big part of the story at the end of this chapter. Once you get to the first room, your cat will use the shadow form to get to a high place and mess everything up behind it.
How To Solve The Giant Clock Puzzle
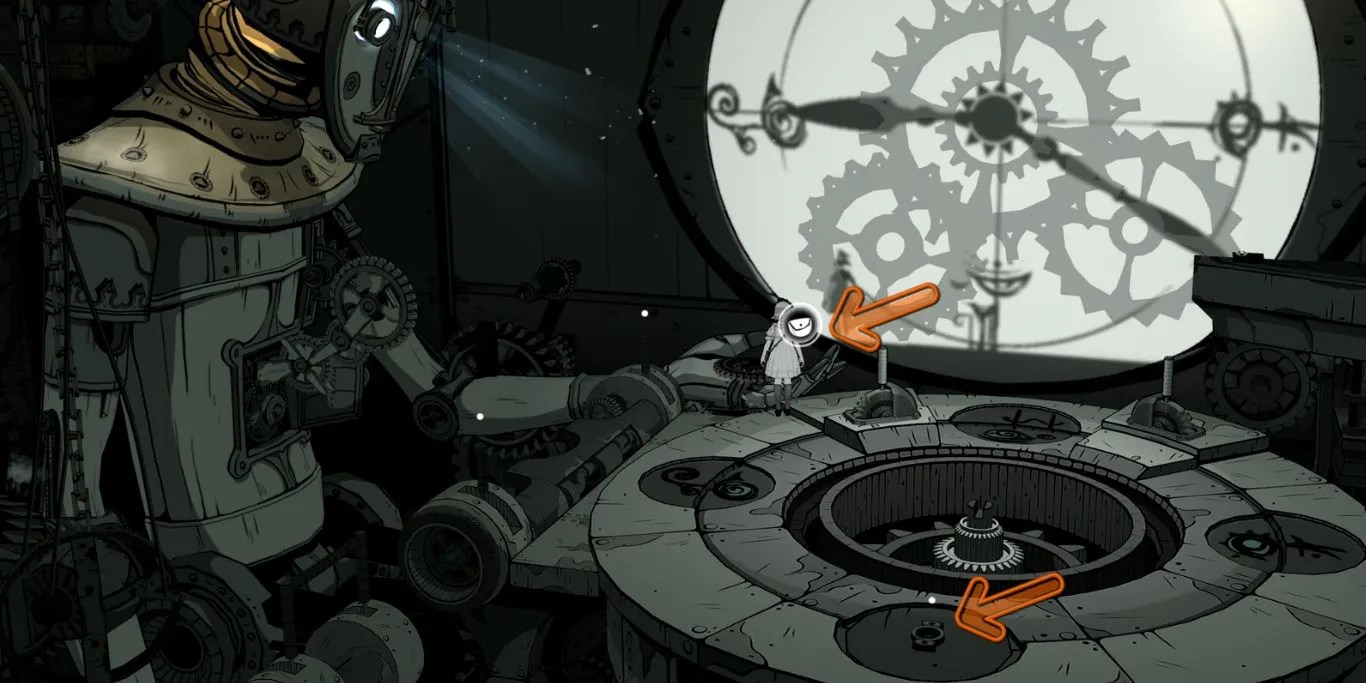
As soon as you’re able to control your character after the cutscene in this area,you’ll see two levers at the top side of this platform with a white dot on top of them. You have to use these two levers to solve the first part of the puzzle since they control the shapes on the four circles around the platform.
You won’t be able to use the levers on the left side of the room near the giant robot until you solve this part first.So, simply head to the top mechanisms and control them as mentioned below.

The lever on the left will rotate different eyes on the circle, while the one on the right will rotate the bodies.You have to match both the eyes and the body to the shapes on the shadow of the clock on the wall. Follow these steps to solve this puzzle:
A cutscene will trigger once you finish the puzzle, and it will reveal two new items in the room.You have to pick up the item at the bottom and place it on the robot’s hand to activate it. Once it’s activated, you can use the two livers near the robot to solve the next part:
After following these steps,you can use the path your cat took to reach the next room.
How To Solve The Picture Frame Puzzle
In the next room, you’ll be able to see a bunch of frames on the right side. To solve this puzzle, you will have touse the four buttons on the bottom-left of your screen to guide the shadow to its destination without any obstacles. The first three buttons control the lights on two frames each, while the fourth button moves the shadow to the next frame.
To solve this puzzle, simply follow the pattern:One - Four - Two - Three - Four - Two - One - Four - Three - Fouraccording to the numbers assigned to the buttons in the picture above. This will solve the puzzle, andyou have to interact with the stuffed toy beside the bed to trigger the next part.

While you’re moving around the room after solving this puzzle, you may run into a basket on the right to get an achievement. Moreover, you can also sit on the bed if you feel like it.
The bear puzzle will be similar to the picture frame one since you’ll have the same circular plate, but there’s a difference. This time around,you have to use your memory to figure out the correct button based on the blinking light on the picture frames. If you press the correct buttons, there will be scenery on the wall.

Here’s the combination to solve this puzzle based on the numbers assigned in the picture:One - Three - One - Three. Upon solving this, the final puzzle of this chapter will be revealed. While the victory is quite close, this is also the puzzle that will take the most time.
This is the kind of puzzle where you’re able to get lost quite easily.Essentially, you need to get both the person’s and the cat’s shadow on the mark with the hood together. Once you do that without having the bat’s shadow on the same point as the other two, you’ll be able to get past it easily.

Although, this puzzle can take a long time to solve if you get lost. Once again,the picture above has labeled the sets of buttons with the numbers one, two, and three. Each of these sets has a left button and a right button. With that in mind, here’s the pattern to solve this:
After finishing this puzzle,you’re able to interact with the picture frames on the right side and click each of them to reveal a story. At the end of this, you’ll get a book and a cutscene, which will open the door to the fourth chapter inside the fireplace.
